We install Innovate’s new MTX-L PLUS wideband air/fuel ratio gauge on English Racing’s Evo X and test it at the track!
Combustion is a beautiful thing to behold. The colors are brighter, the inspiration more fulfilling, and the knowledge gleaned is more detailed when you can see every millisecond of the process. Knowing what’s going on in the combustion chamber is critical if you plan to tune the affair. Datalogging combustion events is an important factor in painting a masterpiece of combustion, and the engine’s air/fuel ratio is a key variable to use in monitoring the engine so you can make smart tuning moves. It’s all about movement as things happen quick at 8,000 rpm.

The Innovate Motorsports MTX-L PLUS air/fuel ratio gauge has cat-like reactions so its fast output speed means the ECU can see changes in the engine mixture as they happen, allowing the engine control system to make adjustments more efficiently. The MTX-L PLUS is also designed to endure heat cycling better which is key in high temperature applications like forced induction or nitrous. The MTX-L PLUS can display in AFR or Lambda and provide full datalogging capability. The gauge features a Bosch LSU 4.9 wideband O2 sensor that combines accuracy and durability, even in the harshest race conditions.
We enlisted English Racing out of Camas, Washington to install a MTX-L PLUS in owner Lucas English’s Lancer Evolution X. English Racing is a preeminent tuner in the northwest, specializing in the Evo, R35 GT-R, and anything with a turbo and a boost-hungry owner.

Lucas’ other Evo X is the quickest Evo X in the world, setting the record with an 8.48 at 164 mph at the 2017 TX2K event. The goal of the install was to show some of the important aspects of the job and convey some insider tricks the pros use so enthusiast can optimize their own installs. Jadan Evans, who has been an installation tech at English Racing for about a year and a half, was put in charge of the install.

In reading the user manual, page three produced the first tip. The manual calls for creating an additional circuit using an automotive relay. Enter the Bussman Add-A-Fuse. It is a piggyback device that produces an additional fuse to power the gauge without loading an existing fuse. Note: For our Evo X install the edges of the connector were shaved with a sander to ensure it fits into the fuse receptacle.
To begin the install Evans had to figure out how to get the wires through the firewall. Remember, the most accessible under hood spot may not be as user friendly inside the cabin. Use an existing route when possible and if you drill a new pathway be sure to install a rubber grommet to avoid wire fraying. Tip: Evans uses a shot of WD40 so the wires slip through the firewall grommets easier.

Since the harnesses and leads are hard-wired to the gauge back, Evans decided to install the gauge in the pod first to determine if there is enough wire to join the harnesses under the dash.
He pre-connected the serial data harness. Tip: Evans likes to tape the ends of loose lead wires together so they are easier to fish through the dash.
It’s time to power the beast. Locate a “key on” power source so the gauge isn’t on all the time. Evans touches the back of the car’s fuses with a test light, finds a dead one, turns the key to the ‘Accessory’ position, the tester lights up, and he’s in business.
After determining which leg of the Add-A-Fuse is designed to maintain circuit continuity, the Hide-A-Fuse is fully outfitted. Note the 5-amp fuse for the gauge.

With the electricity flowing it’s time to calibrate the Bosch sensor. Calibration is done in open air with the sensor unplugged and positioned in the engine bay. Evans turned the key to the ‘On’ position and ‘E2’ illuminated on the display.
He turned the key off and plugged the sensor into the harness, making sure the connectors were fully engaged. He turned the key to the ‘On’ position to power the gauge. In a moment ‘Htr’ appeared on the dial. This indicates the sensor is pre-heating to its proper operating temperature.
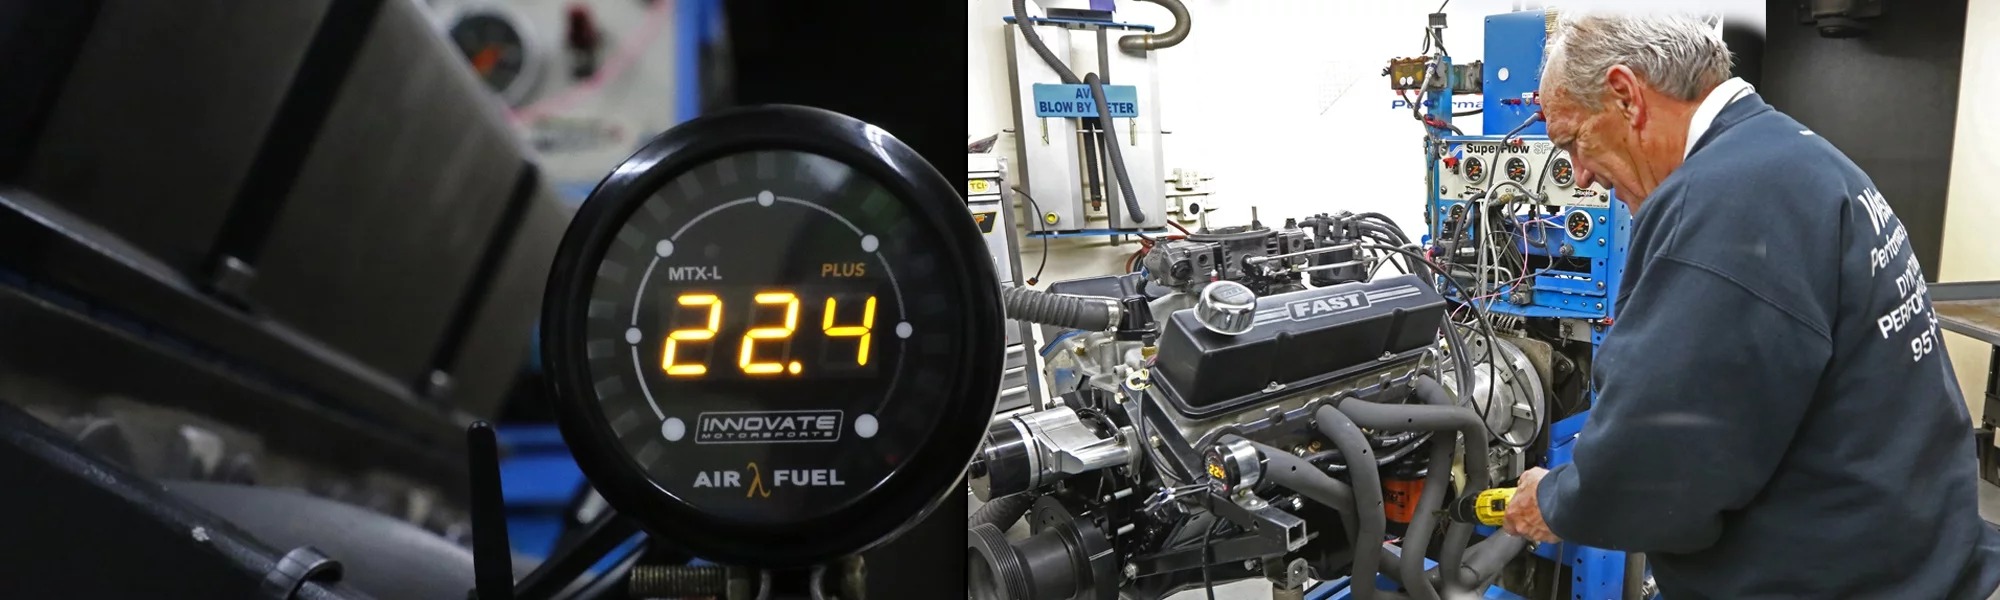
After 30 to 60 seconds ‘CAL’ flashed on the digital display screen, signaling the calibration process was complete. Then an atmospheric reading appeared. It is a default reading in the gauge’s upper limit of 22.4. The unit is dialed and good to go.

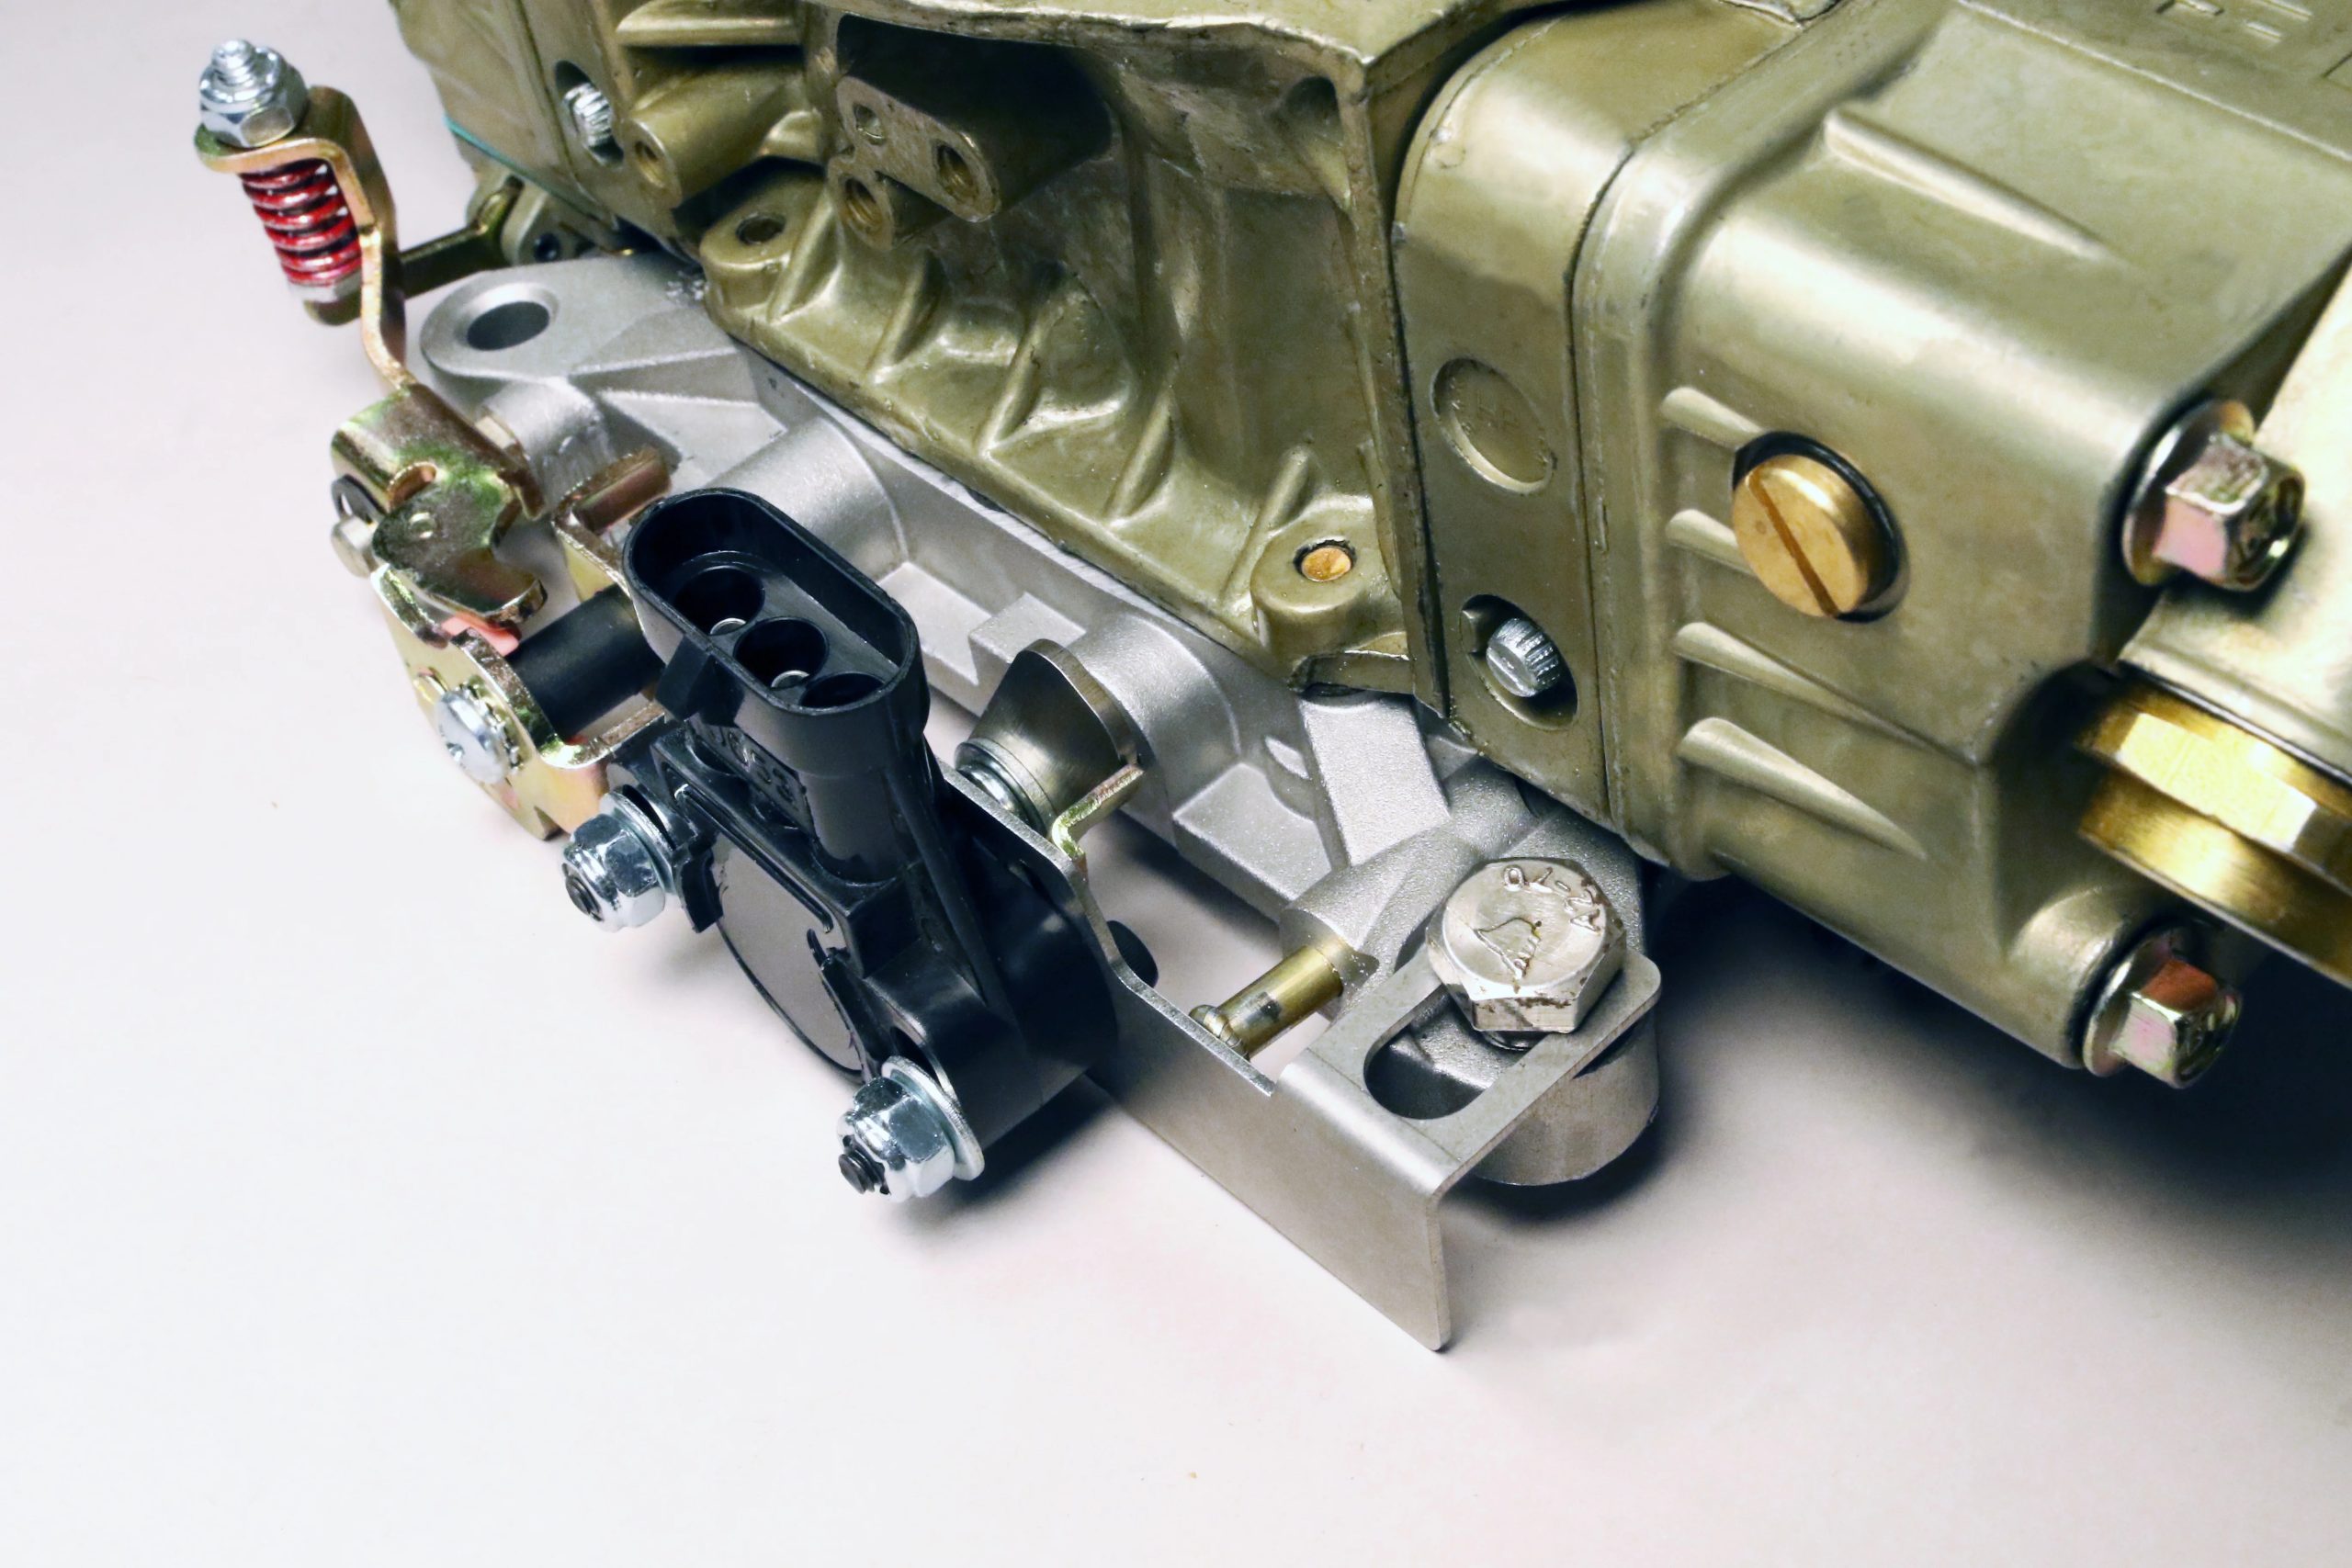
From here it’s a straightforward sensor swap. Evans starts by feeding the sensor to the bottom of the engine near its mounting point. He then lifts the car to fish the sensor and wires out. Evans prefers to screw in the sensor then route the wires/harnesses, paying particular attention to avoiding the exhaust pipes before joining the connectors. Using zip ties the excess cable needs to be secured and the Evo X’s ACD line is a nice, out of the way mounting point. The car has an aftermarket downpipe so no bung welding was necessary which avoids a big-time headache as the downpipe would have to be removed and the bung added.
The Evo X’s 4B11 engine is fired to life and the gauge is observed to check for any abnormal readings. After warming up, the idle AFR hovers around the 14.7 stoichiometric reading.
With the gauge functioning, users can contemplate how much of the MTX-L PLUS’ vast potential they want to realize. Downloading the Innovate Motorsports Logworks 3 software opens the door to datalogging, changing the unit to meter different types of fuel, read AFR or Lambda, and customize the display range.

As part of the Innovate Motorsports Modular Tuning System (MTS), the MTX-L PLUS can be daisy chained with other devices to provide a broader picture of what’s going on inside your engine’s combustion chambers. For example, the MTX-L PLUS can be connected to a SSI-4 PLUS that logs engine speed, throttle position, driveshaft rpm, and MAP voltage then recorded to a PL-1 SD card in your laptop. Join the MTX-L PLUS to a MTX Boost/Shift gauge and log AFR against engine speed and boost, dropping the info on a PL-1. The system can handle 32 channels which should provide a clear, concise, high-resolution picture of the combustion perfection you have tuned into your engine.